Seven Years War
18 June 1757
Prussians: Frederick II: Approx. 34,000, 92 gunsAustrians: Count Leopold Daun: Approx. 52,000, 158 guns
Weather: Mist in low places until mid-morning, giving way to clear, hot weather.
Location:
50° 1’34” N, 15° 6’12” E
about 29 miles (47 km) east of Prague.
Link in the LatLong above, or you can search Google Maps for Kolin, Czech Republic.
Sunset:20:15 End of Twilight: 21:00 Moon: New (In other words, none.)
(calculated from U.S. Naval Observatory)
Kolin was another of those battles demonstrating one of my favorite themes in this blog: Success-Induced Failure. In several ways it fell right into that species of events, like Pickett's Charge (my previous post), Blenheim, and Lobositz. And like Lee at Gettysburg, Frederick was lulled into a false sense of confidence in the power of his own forces and leadership, as well as the reciprocal sense of contempt for the assumed weakness of his enemy's leadership and forces. I do so love the object lessons of these battles.
The map below gives a sense for where the relative forces stood about 13:30 at Kolin, just before Frederick launched his attack. The Prussian infantry had just moved down the Kaiserstrasse to its start line, while its cavalry was still moving to supporting positions. The Austrians, who had been facing west in the morning, were frantically shifting their main forces eastward to meet Frederick's flank attack. (Copyright 2014 Jeffery P. Berry Trust. This image protected by Digimarc watermark against unauthorized copying.)

Kolin was a further humiliation for Frederick because it repudiated his favorite maneuver, the indirect attack, something he would try again, but with more success, at the end of the year at Leuthen. The Austrian Army under a capable leader (in this case, Count Leopold Daun) was to prove itself as professional as the Prussian, as well as adept at decisive maneuver and staying power, demonstrating that the indirect attack was only useful against an enemy who was fixed and unsuspecting (as at Leuthen and at Chancellorsville in 1863).
And for wargamers who like to play the underdog, or who, like me, find more affinity with the Austrians, Kolin is a good subject. It has plenty of room to maneuver, plenty of opportunities for both sides to make blunders, and the ground was hard and relatively easy to move across. Also, the Austrians were at their peak of combat performance this century, every bit the match for the ferocious Prussians. (See section on War Gaming Kolin toward the end of this article.)
The Story So Far: Battle of Prague
The second year of the Seven Years War had started off pretty nicely for Frederick. From his secure positions in both Silesia and Saxony (which he had conquered the year before), he was able to launch a multi-pronged invasion of Bohemia in the spring. His immediate object was the capture of its capital, Prague.This he was to attempt in a fairly pyrrhic fashion on 6 May at the horrific Battle of Prague. Which would rank among one of the bloodiest battles in the age of horse-and-musket warfare.
 |
| Everybody has one worthless brother-in-law, and Maria Theresa's was Charles of Lorraine |
The main Austrian army was lined up on a series of ridges overlooking the right bank of the Moldau River. Frederick moved to outflank the Austrian army by swinging around to its east (his famous indirect approach which he would attempt, too, at Kolin and Leuthen). However, his maps and knowledge of the terrain in this sector were flawed and his men found themselves mired in several unmapped ponds (which looked like meadows before they splashed into them). As they were struggling across these, Charles' ever-capable second-in-command, Marshal Maximilian Browne (of Lobositz fame and, by contrast with Charles, one of Austria's best soldiers), expertly swung the right of the Austrian line to meet them. Having the advantage of interior lines, Browne could quickly feed in defenders faster than the Prussians could march around their flank. Their defensive fire was so devastating that the Prussians were driven back again and again. Some battalions even broke and fled, a first for Frederick's vaunted troops.
The management of this Prussian flank attack was sloppy. Marshal Schwerin, Frederick's old friend (and hero of Mollwitz sixteen years before) didn't wait for his full flanking force to be in place, but kept feeding one battalion at a time across the bogs as they came up, with each one being chewed up by the Austrian defenders. At one point, Schwerin, furious at seeing his own regiment, the 24th, falter, grabbed one of its flags and charged up the slope alone, hoping his men would follow. He was immediately cut down by Austrian canister.
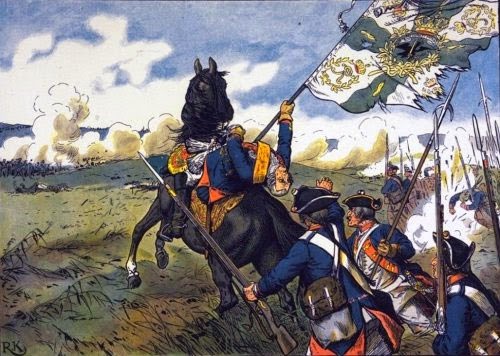 |
| Death of Marshal Schwerin at Prague by Richard Knotel Miraculously, his horse seems to have escaped uninjured from the canister blast. Good for her! |
Eventually, the fury of the repeated Prussian attacks drove the Austrians slowly back. Browne, the on-scene commander, was himself hip-deep (often literally) in managing the defense of the right flank. He had ordered a reserve of eleven battalions under Kheul to plug a gap that had developed in the Austrian line. However, Charles--for God knows what reason--chose this moment to wake up from his stupor and cancel the order, only to reauthorize it a little later. Perhaps he was of that infantile mind, "Hey, I'm the boss! you don't give the orders. I give the orders." Anyway, the damage was done and in the confusion the whole Austrian center began to fall back toward Prague. At this point Charles, in his usual heroic fashion, overcome by the loud, confusing battle, fainted and had to be carried back into Prague, leaving his troops to fend for themselves. Honestly, Maria Theresa did more harm to her country by repeatedly appointing this useless sack of rocks to be her commander-in-chief, even though he had never, ever, ever won a battle for her in 15 years. But nepotism will out. She was very fond of him as her brother-in-law and liked to please members of her family over her obligation to her country. Charles would go on later that year to lose another battle he should have won easily, Leuthen, before the Hofkriegsrat (the Austrian General Staff) finally convinced Maria Theresa to retire him, with honors of course, from military life...for good.
Meanwhile, while Charles was recovering from the vapors in Prague, and the bulk of his army was making a fighting retreat back into the fortress city, he had abandoned the 15,000 men fighting with Browne on the right flank. Most of these escaped southeast to join Marshal Daun's force coming up from eastern Bohemia. Browne, meanwhile, had received a severe wound when a cannonball ripped off his lower leg below the knee. He had at last managed to make it into Prague himself, and even in his agony spent the next several weeks vainly trying to get Charles to break out and lift the siege. Charles was too scared to attempt this, even though for most of these two months he actually outnumbered the dwindling Prussian besiegers. In exasperation Browne gave up. He died from exhaustion and the complications of his wound on 26 June (after Kolin). So one of the biggest losses to Austria of the Battle of Prague had been Austria's most capable commander.
 |
| Frederick in 1757, at 45, before he got old and cranky looking. |
Frederick now settled in for what he anticipated would be a relatively short siege. He calculated that the 47,000 that Charles had dragged into Prague with him would exhaust that city's food within two months-- by the first week of July. Unbeknown to him, however, Charles' own calculations estimated they could hold out only until 20 June. So Charles sent an urgent message to Vienna for relief by the balance of the Austrian field army.
That's all I'm going to cover on the Battle of Prague. I may, at some point, do a more fleshed-out post on this battle (larger in forces and area, actually than either Kolin or Lobositz), but for the purposes of this story, I've done enough to show why there was a battle at Kolin in the first place.
Daun Marches to the Rescue
Having heard the dire news from her brother-in-law in Prague, Maria Theresa and her chief minister, Kaunitz, now ordered Leopold Daun to draw together all of the remaining, outlying forces across eastern Bohemia (including the 15,000 under Serbelloni who had escaped the Battle of Prague) and march aggressively to relieve Charles. Daun, who has been criticized as overly cautious (his chief critic being Frederick), now acted like a regular Patton and pulled all of this forces together to march rapidly westward, chasing the Prussian covering troops of of the Duke of Bevern before them.Frederick, meanwhile, was trying to pry Charles out of Prague and started a bombardment of the city toward the middle of May. But the cannonade proved to be ineffective, so, after a week, he ordered it stopped and sat down to starve the Austrians out. This was a tactically ludicrous situation since Frederick had dispatched so many troops away from the siege to cover the east that the besieged outnumbered the besiegers. Yet Charles could not be induced by the slowly dying Browne to venture out to attack Frederick.
 |
| Count Leopold Daun |
Daun, however, was not living up to Frederick's expectations as an underachiever and kept coming on like a weather front, constantly outflanking the "blocking" Prussian detachments and forcing them back toward Prague. All the while, he was gathering forces, joining up with Serbelloni and Nadasty and raising his overall strength to around 52,000. By 16 June he had taken up a strong position on the high ground (Pobortz Hill on the map above) overlooking the Beczvarka Stream facing west, about 29 miles (47 km) from Prague.
Frederick could not believe that Daun had been acting so aggressively, or that he had moved so far west in force. He left the seige lines around Prague and went east to join Bevern who had established a position anchored on Kauzrim, about 3 miles from Daun's lines. Reconnoitering the heights of Pobortz, Frederick was at last convinced that there was a sizable force of Austrians on it, though he could not ascertain how many. He ordered reinforcements from the siege at Prague, leaving a minimal force to man the lines, and by the 17th had about 34,000 men to attack Daun's 52,000 (a number he was not sure of).
Since Daun seemed ensconced on the heights of Pobortz facing west, Frederick decided to attempt his indirect approach tactic again. On the night of 17 June he began moving his forces up to the Kaiserstrasse (the Imperial Highway) and began marching them down it toward the town of Kolin to outflank Daun. By the morning of the 18th, his entire force was strung out along the highway (see map above). Zieten's hussars and Hulsen's advanced guard had encountered Nadasty's Croats and hussars blocking the highway and gradually pushed them back.
"I do believe the King is going to lose today."
Daun had picked his position carefully. The fields west of Kolin had been the Austrian Army's training grounds the year before, so he and his men knew the ground intimately. It would be, for the Austrians, the reverse of the advantage the location of Leuthen, the Prussians' own training grounds, would give Frederick six months later.
The battlefield of Kolin is generally a wide-open area, covered in gently rolling fields, which, at that time of year, were covered in fairly tall crops--wheat, rye and corn--making it ideal for concealing great numbers of irregular infantry (of which the Austrians had plenty in their Croatian Pandours and of which the Prussians had none). The Austrians also had the advantage of high ground in a sequence of low ridges from Pobortz to Przerovsky to Krzeczor Hills, which allowed them to not only see all of Frederick's movements below, but to conceal and protect their own forces behind the crests. The front of the Austrian position, too, was broken up by a series of walled hamlets, sunken roads, and gullies, which would give excellent cover from which the thousands of Croats could harass the Prussians throughout the battle, slowing their uphill advance.
By late morning, after the ground mist had dissipated, Daun, from his high, unobstructed position, saw Frederick's entire force moving down the Kaiserstrasse below. He began to shift his own army eastward behind the heights paralleling the Kaiserstrasse, ordering Wied's and Sincere's infantry divisions behind the ridge of Przekovsky, keeping them concealed. Nadasty, meanwhile pulled his Croats and hussars back to defend the hamlets of Chotzemitz, Britzvi, Kutlire, and Krzeczor. The latter was made stronger by the presence of ancient earthworks said to be erected by Gustavus Adolphus Swedes during the 30 Years War, over a century earlier, but still high enough to provide a ready-made fort. Others of his 4,500 Croats he strung out parallel to the road, hiding in the high crops from which they were able to pick off the marching Prussians. It was in a manner very similar to the way the American militia harassed the British retreating back to Boston along the road from Concord 18 years later.
View to the south from the Kaiserstrasse toward the Austrian left. This would have been the first view of Daun's army Frederick's forces would have had as they marched eastward. The ground here wasn't as dominated by hills as farther east, but there were ditches (treeline foreground) and gently undulating ground which gave the Austrians' cover.

By 13:00 the Prussians were still getting ready on the road, enduring the murderous fire from the "cowardly" Croats popping up and down in the wheat and cornrows. The Prussians had contempt for these people, whom they regarded as nothing more than bandits, but they had nothing (at least in mid-1757) to answer them with. Though the Prussians would eventually give half-hearted attention to fielding jager and frei-battalions as the war progressed, Frederick never developed a credible light infantry doctrine. In his heart he despised this form of warfare as unmanly. Real men fought standing up, shoulder-to-shoulder in tight formations, where they could be controlled by officers with long pikes from behind. So at Kolin, throughout the morning and early afternoon, the Prussian infantry just stood and took it from the Croats.
About midday Frederick had climbed to the second floor of an inn near Novi Mesto on the Kaiserstrasse to see what he could of his opponent. Even from this higher point he could still not make out the full strength of the Austrian army on the heights above, though he could see dust rising from behind the ridge. (See view below.) So he knew they were up there somewhere.
View of Przerovsky Hill looking south from Frederick's vantage at the Inn at Novi Mesto on the Kaiserstrasse. The Austrian infantry would have been on the reverse slope about 2,300 yards away. Though the field in the foreground is, in this Google Street View photo, open, at the time of the battle it would have been thickly growing with corn, providing concealment for harrassing Pandours.

His plan was to execute an oblique attack (another of his signature maneuvers) beginning with his left (Hulsen's infantry and Zieten and Pennavaire's cavalry divisions) attacking the Krzeczor village and hill first, followed, in echelon, by Tresckow's division (brigades Ingersleben and Braunschweig) going up Krzeczor Hill on Hulsen's right. Bevern's three brigades (Pannwitz, Manstein and Puttkamer) were to remain on the road in reserve. They, in turn, would be supported on their right by Schonaich's cavalry brigade. On the Prussian extreme left, Zieten was to use his 5,900 hussars to shield Hulsen's left, pushing back Nadasty's hussars.
In truth, Frederick was punching in the blind. He was not sure what his troops were facing since most of Daun's force was concealed just behind the heights of Przerovsky and Krzeczor Hills. Austrian 12 pounders under Feuerstein were positioned on the two hills and bombarding the Prussian infantry on the Kaiserstrasse. Neither he nor his subordinates had done a reconnaissance of the two villages on the left, Kutlire and Krzeczor, to see if they were occupied. So he had only a vague idea of what he was facing.
View south toward Krzeczor, about 1,000 yards away, from Hulsen's start line on the Kaiserstrasse. The corn or wheat would have been standing tall here.

By 13:00 Daun, from his own position up on Przerovsky Hill, could clearly see everything Frederick was doing, and what he intended to do. And he was adjusting his positions accordingly, completely unbeknown to Frederick.
Meanwhile, the Croats near the Kaiserstrasse and the Austrian heavy batteries on the Przerovsky and Krzeczor Hills continued to shoot at the standing Prussian infantry, who endured this galling fire for hours, as they had during battle of Lobositz the year before. I do not know whether the Prussian infantry was allowed to lie down while waiting to go in (as the Austrians were), but, from the way they had been used in previous battles, it doesn't seem likely they were. Prussian troops didn't lie down! Also, for these two-and-a-half hours they were still in their columnar formations, which would have meant their companies would have been exposed to enfilade fire from the Austrian cannon.
But Frederick wasn't going to be goaded into a premature attack like he had been at Prague or Lobositz. He wanted to make sure everything was in place, including the Zieten's and Pennavaire's cavalry, which were still deploying to the east.
View north from the approximate position of the Austrian artillery on Przerovsky Hill. Simon Millar, in his book, Kolin 1757, describes the agriculture in June that year as wheat, rye and corn (the latter seen in this photo). This would have given the Croatian skirmishers considerable cover in harassing the Prussians, who had no comparable light infantry to counter them. Frederick's headquarters at the in at Novi Mesto, on the Kaiserstrasse, is about a mile away. (Or rather, was a mile away. It seems to have been replaced by a EuroOil service station.)

Hulsen runs into a nasty surprise.
Finally, at 13:30, the entire Prussian line was given the order to deploy into line right in preparation for attack. From the heights, the Austrians could see the ripple of movement as the blue companies sequentially wheeled into line and the scintillation of thousands of bayonets being fixed. Zieten began to move his hussar squadrons forward to push back Nadasty's hussars on the eastern flank.The Austrian field officers got their own troops to stand up and get into line.
At about 14:00 Hulsen began the attack on Krzeczor and Kutlire villages from the Prussian left with seven battalions (IR#29 Schultze, IR#36 Munchow Fusiliers, Kahlden, Mollendorf, and Wangenheim Grenadiers) with three more battalions of grenadiers (Nymschovsky, Woldow, and Fink) and a regiment of the 2nd Dragoons (Stechow) in support. But he hadn't moved very far when his lead battalions started receiving stiff fire from the two villages and the embankments of the "Swedish Works." This was an unpleasant surprise. The hamlets weren't supposed to be defended (though why the Prussians would have assumed this betrays their contempt for Austrian military competence).
Throughout the wars of the 18th century, since Prussian practice hadn't adopted irregular infantry skirmishing tactics, their infantry frequently ran into the light infantry of Austrians screening their own front. The Croatian light troops (in the case of Krzeczor and Kutlire these would have been the Banal Grenz) were masters of light, skirmishing tactics, as well as ferocious and skilled fighters. They did for the Austrians what the American Indians were doing for their British and French allies across the Atlantic during this war...and what, in our own day, the Taliban and other jihadi guerrillas have been doing to Coalition forces in Afghanistan. By the end of the 18th century, during the Revolutionary and Napoleonic Wars, of course, all European armies would have integrated light infantry tactics into their forces, but in 1757 the Prussians lacked such doctrine or trained light infantry. So they were surprised again and again.
The view Hulsen's infantry would have had as they entered Krzeczor. The church, with it's high walls, is to the right. The crops, hedges, embankments and walls would have been swarming with irritating Croats. The "Swedish" earthworks , also manned by the Banal Grenz, would have been to the right of this photo.

The Banal Grenzers were greatly outnumbered but made Hulsen's Prussians pay dearly to take the two villages. After about an hour of fighting house-to-house and ditch-to-ditch, the Croats retreated back toward the wood just south of Krzeczor (referred to as simply "the Oak Wood" by battle narrators). But they had given Daun valuable time to move his army eastward and shore up his vulnerable flank. While the Banalisters were dashing south across the open space between the village and the Oak Wood, they were attacked by the Prussian Stechow Dragoons (D 11) and Warnery Hussars (H 3). But these, in turn, were attacked in flank by the Austrian Kaiser Hussars (H 2), who drove them back, giving the running Banalisters time to get to the safety of the woods, where they reformed and dug in.
After an hour or so of fighting, Hulsen's battalions had worked their way to the south side of the village in disarray. Seeing the need to reform his command, Hulsen lined up 8 of his battered battalions on the southern outskirts of Krzeczor village at the base of the hill. He left the two battalions of the IR#29 Schultze back in the earthworks as a reserve. Meanwhile, Frederick had ordered Tresckow to move his own division (8 battalions plus a borrowed one from the IR#3 Anhalt-Dessau) to link up on Hulsen's right (see map below). As Tresckow's men advanced they slowly pushed back the Gradiskaner and Szluiner Grenz who had been harassing them from the cover of the high crops and the gullies running down the hillside. These fell back slowly, continuing their irritating fire throughout the battle.
The map below is protected by copyright 2014 Jeffery P.Berry Trust, and embedded with a Digimarc watermark against unauthorized copying.

View looking south up Krzeczor Hill from Tresckow's division abreast Krzeczor village. Wied's troops and an Austrian battery would have been visible on the crest, about 500 yards away. The Oak Wood is no longer there.

Things start to get out of hand for Frederick
Frederick's plan at this point was to seize the Krzeczor Hill and roll up Daun's right flank. But now things began to get out of control. On the Prussian right, Bevern's division was to remain where it was, pinning Daun's center and left on Przerovsky Hill. This was the essence of the oblique attack, to withhold one wing as a reserve for the coup de grace. However, Bevern's men were themselves being relentlessly stung by the shooting-and-ducking Pandours of the Broder Grenz without being allowed to shoot back. When one of Frederick's aides, one Colonel Varenne, galloped by and noticed the nasty Pandours, he took it upon himself to order one of Bevern's battalions (IR#20 Bornstedt / 2) to chase them off. This was strictly against Bevern's orders and the battalion commander protested. But Varenne played his personal-representative-of-the-King card and insisted. The second battalion of Bornstedt moved into the corn to drive away the Croats. Then, unable to let their brothers have all the fun, the first battalion soon joined them. This started a cascading, forward stampede from each succeeding battalion, whose commanders evidently thought there had been a general attack order. Soon Bevern's whole division was prematurely making its way up Przerovsky Hill. As at Prague and Lobositz, the Prussian Army's sloppy command-and-control began to show itself again.This premature attack all worked to Daun's favor, in fact. The uncharacteristically slow deployment of Frederick's outflanking maneuver in full view gave the Austrian time to move his power over to his right in time to meet it...just. And Frederick's unintentional commitment of his right wing under Bevern showed Daun everything Frederick had in his hand. As the map above shows, by 15:30 Wied's command had got into position on Krzeczor Hill, anchoring its right on the tip of the Oak Wood. Sincere's division was quick marching to its left. Starhemberg's infantry had established a supporting, second line behind Wied, on the reverse slope. And Serbelloni had moved his powerful cavalry in a third supporting position. The Austrians had checked Frederick.
Meanwhile, the Austrians had moved up their artillery to counter the 20 twelve pounders that the Prussians had moved to the south of Krzeczor to support Hulsen. The previous decade of reform and refitting under Prince Liechtenstein had paid off. The new Austrian artillery at the beginning of the Seven Years War had become the finest in Europe, with modern equipment, new doctrines, and an unparalleled professionalism. Though outnumbered on the right, the Austrian gunners gradually neutralized the less experienced Prussians guns, as well as exact a considerable toll on Hulsen's grenadier forming up south of Krzeczor.
The Prussian guns, though, firing uphill, overshot and unintentionally laid down fire on Serbelloni's cavalry behind the Krzeczor Hill (see this same effect at Gettysburg from my previous post). The Austrian cavalry, however, held its ground and Serbelloni had his officers constantly move their squadrons forward and backward to minimize the effects of the fire. This was a tactic that the Austrian cavalry had also employed at Lobositz the year before. One thing the Austrians did in contrast with the Prussians was to keep their troops out of fire while waiting, either by having the infantry lie down or shuffling their cavalry. This not only minimized casualties but bolstered the morale of the troops.
In the center, opposite Tresckow's and Bevern's advance, more Austrian guns made the advancing blue lines pay as they labored up the hill. And the Pandours covering the center, though pushed back by the advancing solid lines of Prussian regulars, continued to harry them from the ditches, woods, and sunken roads that covered the slope. It was costly going for Frederick's infantry.
Daun's first crisis
By 16:15 Tresckow's division had come abreast of Hulsen's grenadiers south of Krzeczor and all now started to push make the final push to the crest of the hill. But Sincere had also, in the nick of time, brought his three regiments (Botta, Baden-Baden, and Deutschmeister) to lock them into the left of Wied's line to receive them.
At the Oak Wood, Hulsen had sent in four battalions (IR# 36 Munchow Fusiliers, Wangenheim and Mollendorf Grenadiers) to clear out the Banal Grenz. They did this temporarily but Nadasty rallied the Banalisters, and Strahemberg and Wied mustered a strike force of the grenadier companies of all of their regiments to chase the Prussians out of the woods, forcing them to abandon three battalion guns in the process.
As so often happens in battle, a localized victory can cause the immediate victorious side to prematurely give chase. This is what happened as Wied's battalions witnessed the Prussian cavalry (DR #11 Stechow and HR#3 Warnery) and the Hulsen's infantry scamper back through Krzcezor village. Without orders Wied's battalions started to run after them, leaving the cover of the Oak Wood and exposing their flank.
Galloping in at the right time (for the Prussians) Krosigk's fifteen squadrons of cavalry (now led by Col. von Seydlitz who had taken over the brigade from the wounded Krosigk) (DR#1 Normann, CR#2 v Preussen, and CR#8 Rochow) hit the exposed right flank of the advancing d'Arberg regiment. One by one, the successive Austrian battalions crumbled as the charging Prussians rode on.
At the same time, Tresckow led his infantry straight at the Austrian line. By about 17:00, with Prussian cavalry thundering on their right and the Prussian infantry bearing down on their front, much of the Austrian front line had started to crumble. Two regiments of Austrian and Saxon cavalry (Kolowrat Dragoons and Saxon Garde Carabiniers) were fed forward by Serbelloni to bolster the failing infantry, but they, in turn were hit in the flank by the Prussian Normann Dragoons and also fled. Very quickly, the entire Austrian first line seemed in retreat. The two right regiments of Sincere's line (Deutshmeister and Baden-Baden) also gave way as the Prussian squadrons reached them.
In Starhemberg's supporting line, the left hand regiment, Haller's Hungarians, witnessing the panic in the front line, must have said (in Hungarian), "To hell with this!" slung their muskets, drew their sabers, and, in customary Magyar form, charged. But they were met with controlled volleys from Tresckow's infantry and, in their turn, hit in the flank by the Prussian 8th Cuirassiers (Rochow) and overrun.
Everything on the right was falling apart for Daun. It looked like Frederick had achieved his easy victory after all.
Not so fast, Mr. The Great
But all was not lost for the Austrians. Admittedly, things looked pretty bleak at 17:00, with Wied's division and most of Sincere's falling back, Prussian cavalry running amok, and Tresckow's battalions coming on like a moving wall of fire. It looked bad. But Daun wasn't Prince Charles. He didn't tend to faint.
Nor did the Austrian rank-and-file tend to faint. Several regiments had been broken up but they were now rallying and reforming like the professional soldiers they were, even as the victorious but unformed Prussian cavalry was pausing to reform itself on top of Krzeczor Hill. And not all the other Austrian regiments had broken. Sincere's left-hand regiment, three battalions of Botta, stood firm and delivered controlled volley after volley to stop both the oncoming infantry of Tresckow and the Prussian cavalry, covering their fellows in the Baden-Baden and Deutschmeister regiments while they rallied. One of Wied's regiments, Salm-Salm, had not broken either but had fallen back to link up with the still-steady regiments of Starhemberg's brigade (Gaisruck and Neipperg). And Serbelloni moved up his cavalry to plug the gap and throw back the rampaging (but now disordered) Prussian cuirassiers.
So Daun averted disaster--barely--thanks to the tenacity and professionalism of his troops and the quick thinking of his subordinate commanders. The Austrians continued to rally themselves. And Daun moved more pieces on the board.
For the previous two hours Frederick had been distracted by the frustrated attempts by Bevern's command (remember, it was supposed to stay in reserve according to Frederick's original plan) to take Przerovsky Hill. Eventually all eleven of Bevern's battalions were committed, attacking and falling back repeatedly. But the Austrian line on the hill (Andlau's brigade of infantry regiments Erzherzog Karl, Moltke, Puebla, and Mercy) wouldn't budge. At one point, exasperated, Frederick galloped to the front of one battalion to lead a charge personally up the hill, shouting "Dogs! Do wish to live forever?" Apparently the men must have felt this was a legitimate existentialist question and answered for themselves, "Well, since you put it that way... yes, as a matter of fact," because an aide caught up with the king to point out that nobody was following him. How embarrassing.
 |
| The 1st Battalion Leibgarde face front and back to fend off the Hesse-Darmstadt Dragoons. Painting by 19th century salon artist Richard Knotel. |
The map below is protected by copyright 2014 Jeffery P.Berry Trust, and embedded with a Digimarc watermark against unauthorized copying.

Serbelloni, seeing the Prussian heavy horse lumbering up the valley between Chotsemitz and Bristvi, ordered three of his own cuirassier regiments (Kalckreuth, Portugal, and Schmerzing) to counter-charge. The Austrian horse would have the advantage because the Prussians had the farthest to go and would be climbing uphill the whole way, through tall crops, so would arrive winded and somewhat out of order at the top.
However, due to some misunderstanding, the three Austrian regiments turned and filed behind Stahemberg's infantry before Pennavaire's cavalry got to the top, leaving a hole for the Prussians to exploit. The Prussian cuirassiers thought they had achieved an easy, bloodless victory when they saw what they interpreted as the Austrian horse scampering away in terror.
This turned out to be a fortuitous event for the Austrians, though, since Serbelloni immediately sent 26 more squadrons (Savoyen Dragoons, Birkenfeld Cuirassiers, and all the Saxon cavalry) to hit the Prussians as they crested the hill, surprising them just as they thought they had chased away the first line of Austrian cuirassiers. This, and a simultaneous attack in their left flank from the Kommanditieren Cavalry, as well as the concentrated volleys they received from the redoubtable Botta regiment on their right, sent all the Prussian cuirassiers stampeding pell mell back down the hill, galloping over their own infantry in the way (Tresckow's battalions), who were next hacked down by the furious Saxon cavalry chasing the Prussian cavalry. Tresckow himself was wounded and taken prisoner in this rout.
While this disaster was happening in the Prussian center, the 2nd Prussian Cuirassiers (the yellow jacketed Prinz von Preussen) had worked their way around the north of Krzerczor village and filtered through Tresckow's line. As soon as they reformed, they charged helter-skelter at Starhemberg's infantry on Krzerczor Hill. They didn't get very far. Starhemberg's men were, by this time, reformed, resupplied with ammunition, and met the single, unsupported cuirassier regiment with controlled volleys. The Austrian artillery, still intact, also devastated the Prussian horse with point-blank canister. The survivors filtered back through the chinks in Tresckow's line, who were, themselves, now being attacked in the rear by the Saxon and Austrian cavalry returning from having routed Pennavaire's division.
Frederick's cavalry had not made a very good showing today.
Frederick's last Hail Mary
With the attacks by Hulsen, Tresckow and Pennavaire failed and most of their troops pretty much spent for any further action that day, Frederick now tried one last push. It was now about 18:30 and he had only about an hour left before sunset. Time was running out. He had Puttkamer bring over his brigade (IR#22 Moritz, IR#25 Kalckstein, IR#40 Kreytsen Fusiliers, and the remnants of 1st Battalion Leibgarde #15) to join with what was left of Tresckow's men in one last blow on the Austrian center. Puttkamer's men were fresh, his last uncommitted reserve, and Frederick was certain that the Austrians, who had been fighting all afternoon, must be getting tired and out of ammunition. This would be the last minute save he counted on. His infantry never let him down. And so far, they had managed to open up a gap in Daun's center, which Frederick would now exploit.
Daun, after the spectacular defeat of the Prussian cavalry, saw his chance to make a killing blow. He pulled his center infantry (Botta, and Erzherzog Karl,) back toward Przerovsky Hill (see map below), supporting them with three cuirassier regiments (Kalckreuth, Portugal, and Schmerzing). Seeing that the threat to his left was pretty much contained, with the Prussians in rout on that sector, he felt secure enough to get Andlau to hustle his three regiments (Moltke, Puebla, and Mercy) from Przerovsky Hill over to support Wied and Starhemberg rallying on his right in the Oak Wood. The race was not over yet.
The Austrian line on the left-center (under Sincere) had been pushed back almost at right angles to its original face, but it was not yet broken. The Deutschmeister and Baden-Baden regiments had retreated in the face of the 14 battalions the Prussians had on the hill, but the heroic Erzherzog Karl and Botta regiments (as well as an ad hoc battalion of grenadiers Sincere had thrown together on the left) were staunchly returning volley for volley, exhibiting not just fire discipline, but careful marksmanship in firing low and waiting for the Prussians to come up close. These were holding back the blue tide. At one point, the Botta regiment was running out of ammunition for the second time that day when their young commander, Franz von Kinsky, held up a passing ammunition wagon belonging to another regiment at gunpoint. So the Bottas were able to keep firing thanks to this highway robbery.
Supporting the first Prussian line marching obliquely up the hill, the infantry regiment IR#22 Moritz and the undaunted battalion of the Leibgarde (IR#15/1), started working their way south to outflank Sincere's line. These three battalions, however, were completely surprised by a furious charge from all sides by Serbelloni's cavalry, who rode them down. This was the second time that day that the Leibgarde had been ridden over, and like the first, they turned front and back and fought off the Austrian dragoons until they fell to the ground and let the Austrians ride over them. The survivors again picked themselves up and, with the colors they had left, and marched back over the hill to the Kaiserstrasse with their dignity. The three battalions, though, reported 77% casualties for the battle.
The map below is protected by copyright 2014 Jeffery P.Berry Trust, and embedded with a Digimarc watermark against unauthorized copying.

Serbelloni's cavalry, supported by the Saxons, continued on their charge and began to hit the rear of the Prussian main line engaged with Sincere's outnumbered brigade. They were joined by three more regiments of cuirassiers (Schmerzing, Portugal, and Kalckreuth) from the west, who began to roll up the Prussian line from the south. Sincere's infantry fixed bayonets and charged the wavering Prussians, who were themselves starting to gradually break up into small groups and retreat back to the Kaiserstrasse. By 20:00 the whole line was in retreat under the gloom of twilight.
Andlau had, by this time managed to hurry his brigade over to the Austrian left to support Wied and what was left of Starhemberg's command. The Prussian left wing commander, Hulsen, who had managed to retake the northern part of the Oak Wood, saw now that he couldn't hold it in the face of these unexpected Austrian reinforcements, so he ordered his men, too, to make their way back in small groups. By 21:00 all of the surviving Prussian troops managed to limp back to their start line
The battle was over. The Austrians were stunned. They had won. They had actually, for the first time, beaten Frederick in a standup fight. Their infantry had outshot his and held the ground. Their cavalry had ridden down his cavalry. And their artillery had smothered his artillery and butchered his cavalry in close range firing. Frederick was beat by every arm. And Daun hadn't even committed his whole army (the brigades of Stampach and Puebla were still fairly fresh on the left at Pobortz Hill).
Of course, Frederick, long before the final decision had been made, vacated the field; just as he had done at Mollwitz in 1741 and at Lobowitz in 1756. He wasn't one of those ferocious monarchs like Harold or Boudicca who stayed with his/her men in the face of defeat. The next time we see him, he's discovered by his retreating troops sitting on the edge of a culvert on the Kaiserstrasse, sulking. It's probably apocryphal but a cuirassier trooper supposedly brought him a hatful of water to drink (yum, would you drink out of some sweaty hat?) and admonishes him to buck up, "Drink, your majesty, and let battles be battles; it's well that you are safe. Let us trust in God that it will soon be our turn to conquer!" I would have loved to have heard what the King's reply was to this soldier soldier who had failed him yet again.
This little scene was immortalized in one of the famous Prussian propaganda illustrations made by Richard Knotel a century-and-a-half later.
 |
| Prussian enlisted man hands his king a hat full of dirty water and gives him an unsolicited pep-talk. Looking at this print, I wonder why the shadows are pointing at the setting sun. Ask Richard Knotel, the artist. |
I'm sure it happened just as it was described. Except, in Knotel's picture, the sun seems to either be setting in the north or the Prussians are retreating south, in the direction of the Austrians. Or that's the full moon rising (which might explain the shadows) and the Prussians are retreating north, instead of west. But wait! The moon was new, which was the opposite of full.
But the incident could just as likely been apocryphal, one more anecdote of Frederican legendeering.
The battle, which had lasted half the day, was bloody, to say the least. The Prussians lost 13,768 casualties, or 40% of their force; a truly horrific defeat. The Austrians lost some 9,000 men, or about a 17% casualty rate. This is what distinguished Kolin from either Prague or Lobositz the year before, battles in which both sides suffered more or less equally. I have observed that there's a misconception that 18th century battles were less destructive than later Napoleonic ones. But battles like Kolin refute that. It was a slaughter, particularly for the Prussians.
Kolin was a tactical victory for Austria, but also a strategic one in that it compelled Frederick to abandon his weeks-long siege of Prague and retreat back into Saxony. So the primary mission entrusted to Daun, to relieve Prague, was accomplished as well.
Maria Theresa was, herself, so relieved and overjoyed that she created a new medal, The Military Order of Maria Theresa, especially for the veterans and commanders at Kolin, Austria's first unequivocal victory over her arch-nemesis, Prussia. Of course, her brother-in-law, Prince Charles, who was nowhere near the battlefield and had no part in its planning, was one of the first to receive this medal for his "brilliant victory" (he was, remember, the titular commander-in-chief of all of the Austrian forces). If ever one had a worthless brother-in-law, Maria-Theresa's was Charles.
Unfortunately, once Charles was rescued by Daun and was able to personally escape from Prague, he took "active" command again and proceeded to botch up the pursuit of the retreating Prussians, allowing them to get away and reform. Kolin could have ended Frederick's participation in the Seven Years War had the Austrians followed through on it. But Charles knew better.
Frederick, in one of the most remarkable turnarounds in military history, in the months after Kolin, and perpetually outnumbered throughout the rest of 1757, was able to achieve two incredible victories (Rossbach and Leuthen) which turned the whole war around in his favor. The latter defeat for the Austrians, of course, was the fault of Prince Charles again, who was shortly (and finally) relieved of any further command for good by his indulgent sister-in-law. Much to the relief of everyone else, as well.
Final remarks on the battle
Return on InvestmentIn this battle the investment in reforms that the Austrian defense establishment had made over the previous decade paid astounding returns. They had learned much from their losses in the previous war (of the Austrian Succession) and had applied that learning to great effect. Their tactics were improved, adopting the fire systems and the modern three-rank formations of the Prussian infantry. And the iron ramrod replaced the venerable beechwood one of previous decades, allowing an increase in the rate of fire. The battle showed that training had paid off, with the Austrian infantry holding its own against their Prussian counterparts. Even though they'd lost their cohesion several times during the long fight, most of them rallied to get back into it. This was not the Austrian army that the Prussians had been used to fighting.
The Austrian cavalry, probably their best arm during the previous war, was even better trained and mounted in this one. As Kolin demonstrated, they were able to out-maneuver and out-fight the Prussians consistently, whipping virtually every last squadron sent against them.
And their artillery, under the reforms of Liechtenstein, was, in terms of equipment, logistics and tactics, probably the best in the world by the beginning of the Seven Years War. It certainly dominated the Prussian artillery at Kolin and was able to significantly supplement the close-support fire for the infantry. For decades after Leichtenstein's reforms, Austria's long arm was considered the finest in Europe and when Gribeauval started to reform the French artillery in 1765, he modeled it on the Austrians'.
Snatching Defeat from the Jaws of Victory
Unfortunately, due to the death of Austria's best general (Browne) and the bungling of Prince Charles, the momentum afforded by Kolin was not exploited and the war went on and on. But it did give Austria the needed psychological boost it needed to continue the war for six more years, and ultimately to negotiate favorable terms at the end.
The Prussians Suffer from Success-Induced Failure
The Prussian performance at Kolin was mixed. Their infantry, as usual, saved what could have been an even greater disaster. Most of the regiments fought doggedly until they themselves ran out of ammunition and only quit the field under orders and as night fell. Many battalions were ridden down by the Austrian horse and cut to pieces. But most retained their colors and none broke and fled.
The same could not be said, though, for the Prussian cavalry. Though there were isolated examples of valor, for the most part, they just broke and fled, just as they had done in the previous battles. By Kolin they were decidedly not as good as the Austrians.
Where was Zieten when all this was going on?
Finally, everyone, in the narratives I could find, seems to have forgotten any action on the far eastern side of the battle between all of the Prussian and Austrian hussars (under, respectively, Zieten and Nadasty). Apparently this action spread out almost all the way to Kolin city, with small skirmishing going on all afternoon. Zieten himself was so disconnected from the main battle that he is reportedly to have been completely surprised that the Prussians were in retreat. At any rate, his light cavalry gave no help that day, either to the combat in the main battle or as reconnaissance. Frederick was fighting in the blind, thanks to Zieten. While Daun, thanks to Nadasty, had ample light infantry and cavalry coverage and information on enemy movements.
Wargaming Kolin
Kolin was a big battle composed of several small actions, each of which could be simulated in a miniatures game. The scale of Kolin itself made the ground over which it was fought bigger than Gettysburg or Waterloo and about the same as Austerlitz. And it was segmented, as a play, into several acts, each lending itself to a battalion-level tactical game.Relative Combat Efficiency
As I remarked above, because of the reforms of the Austrian Army in the years prior to the Seven Years War, the infantry of both sides should be considered equivalent in terms of combat efficiency, morale, and training; i.e. both would be rated as fully professional veteran level troops.
I would rate the Austrian cavalry as somewhat better than their Prussian counterparts, as events proved. They were certainly better employed.
And the Austrian artillery was much more efficient than the Prussian, able to move and unlimber faster, and act as well as Napoleon's artillery fifty years later.
Light Troops
The Austrian Pandours, as well as their hussars, did marvelous service for Daun during this battle, as they had in previous battles. They gave him very good intelligence. They screened his own army effectively. They consistently stalled, irritated, and broke up the Prussian infantry on their way up the hills. And they even held up the advancing Prussian close-order formations with dogged defense of the villages. Even after the Prussians had taken those villages and moved up to Krzceczor Hill, the Pandours hid in houses, ditches, woods and behind walls to snipe at their flanks and rear. The Prussians really never did completely get rid of them. They were like a persistant infection in Frederick's feet.
The Prussians, at this stage of the war, had really nothing to answer the Pandours. And his own hussars under Zieten, apparently felt their job was to fight toe-to-toe with their counterparts and not provide any screening or reconnaissance.Consequently, Frederick, though he was trying to execute a surprise flank attack on Daun, was fighting completely in the blind, while Daun was able to monitor his every move and react in time to it.
Hidden Movement
The nature of the topography at Kolin gave the Austrians a decisive advantage. Like Wellington at Waterloo, they could conceal their main force and move troops back and forth behind the screen of the ridge south of the Kaiserstrasse. Frederick never knew what Daun's strength was at any point. Also the high cereal crops (corn, wheat, rye) at the time allowed the Pandours to hide.
A war game could provide for this hidden movement for the Austrian player. While he/she could observe every movement of the Prussian player, any movement south of the Pobortz-Przerovsky-Krzerzcor ridgeline on the Austrian player's part could be done as concealed movement until the Prussian crested the hill.
Infantry vs Cavalry
While there didn't seem to be any instance I could find of infantry using squares at Kolin (though this formation had been in use for generations), there also doesn't seem to be any reason why a war gamer couldn't employ them. They were certainly available to the menu of tactics then. Perhaps local commanders didn't wish to expose their infantry to artillery fire with dense formations.
But though no formal squares seem to have been reported at Kolin, there were several instances when the Prussian infantry turned its third rank around to fire at cavalry attacking its rear, or from both sides. So some allowance in war game rules should be made for this effect (say 1/2 fire effect from each side). Of course, this would still leave the ends of a linear formation exposed to a flank attack, as happened to both IR#22 Moritz and IR#15 Leibgarde, and being overrun.
Orders of Battle
The following OOB lists were compiled primarily from Simon Millar's Osprey book, "Kolin 1757" (Campaign 91) as well as the OOB in the Kronoskaf article on the battleCommand, besides listing the name of each command, is also coded for primary coat color of the regiment. The alpha-numeric code after each name is the later numerical designation in the Prussian and Austrian armies, for cross-referencing in Kronoskaf or Duffy (see References below).
Facing is color coded in the facings of the regiment (e.g. cuffs, lapels, etc.) For more precise uniform information I refer you to Kronoskaf or Duffy. Under this column, too, is the Military symbol coding for the command (division, bridade, regiment, squadron, etc. as well as the code for the type of unit).
Flags displays miniatures of the flags carried into battle by the units, both the colonel's color (carried by the 1st company) and the regimental colors (carried by all the rest in the regiment). Where units did not carry flags on campaign (like hussars or combined grenadier battalions), this cell is left blank.
Strength is an estimate of the strength of each unit at the time of the battle. NB: Please don't use these data for academic reference. Since there were not available precise unit musters during this period (at least that I have been able to research), I have used the gross estimate of strengths reported, and proportionally found the mean for each type of unit. Then, for fun, I applied a randomizing formula around the mean for each type of command (+/- 5%) to make a wargame feel more realistic.
Guns is number of guns assigned to each command. For this OOB since sections were assigned to individual battalions for close support, I have reflected that here.
Ranks is the standard deployment depth for each type and army at the time of the battle. The Austrians would later that year begin to deploy in 3 rank infantry formations (and 2 rank for cavalry), but at Kolin they were still deploying on the old 4 and 3 ranks respectively.
Subunits, list the building blocks for each type of command, for instance a Prussian battalion would have 5 companies, an Austrian 8.
Notes is used to mark artillery calibers, or position of larger commands in each army. But I've also used this to show the color schemes of Prussian grenadier and fusilier headgear, for quick reference. Again, for anyone painting models, I refer to Kronoskaf.


References
I relied on the following references in composing this post, with most of the detail coming from Millar.
Asprey, Robert, "Frederick the Great: A Magnificent Enigma", Ticknor & Fields, ISBN 0-89919-352-8
Duffy, Christopher, "The Army of Frederick the Great", Emperor Press, ISBN 1-883476-02-X
Duffy, Christopher, "Frederick the Great: A Military Life", Routledge, ISBN 0-415-00276-1
Duffy, Christopher, "The Army of Maria Theresa", Terence Wise, ISBN 0-7153-7387-0
Duffy, Christopher, "Instrument of War: The Austrian Army in the Seven Years War", Emperor's Press, ISBN 1-883476-19-4
Duffy, Christopher, "Military Experience in the Age of Reason," Atheneum, 1987, ISBN 0-689-11993-3
Duffy, Christopher, "By Force of Arms: Vol 2 of The Austrian Army in the Seven Years War", Emperor's Press, ISBN 1-883476-39-4
Frederick the Great, "The Art of War", Da Capo Press, 1999, ISBN 0-306-80908-7
Haythornethwaite, Philip, "Frederick the Great's Army 1 Cavalry", Osprey Publishing, ISBN 1-85532-134-3
Haythornethwaite, Philip, "Frederick the Great's Army 2 Infantry", Osprey Publishing, ISBN 1-85532-160-2
Haythornethwaite, Philip, "Frederick the Great's Army 3 Specialist Troops", Osprey Publishing, ISBN 1-85532-225-0
Haythornethwaite, Philip, "The Austrian Army 1740-80: 1 Cavalry", Osprey Publishing, ISBN 1-85532-415-6
Haythornethwaite, Philip, "The Austrian Army 1740-80: 2 Infantry", Osprey Publishing, ISBN 1-85532-418-0
Haythornethwaite, Philip, "The Austrian Army 1740-80: 3 Specialist Troops", Osprey Publishing, ISBN 1-85532-4180
Millar, Simon, "Kolin 1757: Frederick the Great's first defeat", Osprey Publishing, Campaign 91, 2001, ISBN 1-84176-297-0
Nosworthy, Brent, "The Anatomy of Victory: Battle Tactics 1689-1763" Hippocrene, ISBN0-87052-785-1
Online References:
Kronoskaf: Seven Years War: Battle of Kolin
johnsmilitaryhistory.com/Kolin For panoramic, on-the-ground photography of Kolin , this site is unequalled.
Yet another great on-the-ground battlefield tour is found at Graham Morris's blog, Battlefield Anomalies. https://battlefieldanomalies.com/wp-content/tours/kolin/index.html
©
Copyright 2014, Jeffery
P. Berry Trust, all rights reserved. No part of this post may be used
for republication or re-posting without documented permission of the
Jeffery P. Berry Trust. However, feel free to link to this site as a
resource from related sites.
Thanks for the brilliant narrative and maps! The clarity of your articles is refreshing. If I may make a suggestion, I think the elevations in the maps could be somewhat easier to identify.
ReplyDeleteThank you so much, Joaquin, for your kind compliments about my article and maps. Means a lot to have such enthusiastic response.
DeleteRe: Elevations on the Maps.
Good observation on your part. This is an issue I've been wrestling with all along. I've been trying to find a balance between my own personal esthetic and a tactically usable graphic. I've tried on more than one occasion to use contour lines, or contour shading (greater density for lower elevations), but the results were all confusing, so I ended up abandoning the effort. My goal has been to make the maps look like virtual sand tables, hence the 3D shadowing (with the light source coming from the south, as the sun would in the northern hemisphere), still abstract but more analog.
Also the problem I've always had with contour maps is that they are so binary and abstract. Slopes don't suddenly jump from one elevation to the next, as they do in contour maps or game boards. In the case of Kolin, the three hills themselves (Pobortz, Przerovsky and Krzeczor) were part of one long ridge that rose steadily and gently from the Kaiserstrasse (as you can see in the photos).
Jeff, awesome research and delivery as usual, I love reading your posts.
ReplyDeleteI particularly enjoyed the sidebar regarding the lighting in the Knotel painting, quite humorous. As someone who has done some illustration it appears to me that the sun was added as an afterthought, perhaps by the publisher and maybe even without the artist's knowledge.
Thanks again, I do enjoy your approach to these battle descriptions, though your biases do show through rather strongly.. that isn't a criticism as it is part of who you are as a writer, just an observation.
Loved your comment, Bil. Right back to you. Thanks awfly.
DeleteI'm glad my biases show strongly, and glad you notice them. My philosophy is, what's the point of writing without a point of view...and humor? Why do historians think you have to be dry and passionless? I want more people to read history. And I think I know how to get them to do it.
I like the references to your other posts. They were especially helpful when I was thinking, "Didn't the Croats or some other irregular troops do this to the Prussians in one of the other battles?" And then the question is answered.
ReplyDeleteWhile it is true that Frederick like to use the Oblique Order and flank attacks, he really hadn't perfected the tactic at the time he fought Kolin. I can only think of Prague and Kolin as the first two times that the tactic was used. It was refined at Rossbach and reached its zenith at Leuthen. By then, the Austrians were on to this as his favorite tactic. The main lesson of Kolin was that the attack commenced before the army had been fully deployed. Frederick applied what he learned to his management of the battle of Leuthen. I will have to do a little more reading, but I don't think that Frederick "ran away" at Kolin as he did at Mollwitz and Lobositz.
ReplyDeleteThese are all nits to pick, to be sure, and they do nothing to detract from your excellent presentation of the various SYW and WAS battles of Frederick. Nicely done sir!
Gracias, meine alte freund.
DeleteI'm working on another Frederican battle, Zorndorf in 1758, in which he employed the indirect attack again, with similarly botched results. The trouble is, unless you can do it in secret (as he did at Leuthen and as Stonewall Jackson did at Chancellorsville), it doesn't work.
One other comment on the indirect attack. You mentioned Rossbach. Ironically, the Franco-Imperial army attempted this on Frederick himself, and the latter was able to counter it before it fully developed. So it was a very risky maneuver. Perhaps it was a lesson he had learned from Kolin earlier that summer.
DeleteThank you for this blog, just dicovered it. Brilliant. My only wish is that there was more info on the logistics of the campaign, supply-lines etc. Im fairly up to date on how the actual fighting went down, but know next to nothing about how the resupply-system etc. functioned.
ReplyDeleteThanks so much, Martin for reading my blog and your compliment. You're right that an army can't fight without supplies and doomed campaigns nearly always met their end because somebody forgot the army had to eat. But that doesn't make for lurid narrative. My audience seems to want to get to the carnage. As my grandfather used to sarcastically say about war movies, "More fun! More people killed!"
ReplyDeleteHi Jeff,
ReplyDeleteThank you very much for this article. I'm currently setting up a re-fight and it is proving most valuable, with plenty of food for thought.
Without it I wouldn't have a clue where Frederick placed his guns. No one else (in my sources) seems to mention it - apart from Millar, who unhelpfully calls them Hulsen's guns, and I've always assumed he meant battalion pieces as the heavier stuff doesn't appear in his OOB.
All the Best,
James (olicanalad)
You're welcome, James. Looking forward to the photos on your own blog of the wargame.
DeleteIts certain the prussians shot 3 times as fast as austrian infantry and manoevere was far superior. Also while the prussian commander of the cavalry here was poor prussian cavalry were far superior in the charge and generaly for both i suggest Brent Nosworthy 'anatomy of victory' he has analysed both armies in detail for this period and has no bias unlike other writers . Also if you make the armies equal in capability it will be a lousy game and the prussians have zero chance
ReplyDeleteThanks for your commentary, Steve.
DeleteI have to take issue with your conclusion that a war game of Kolin would be "lousy" unless the Prussians are rated as superior to the Austrians. I have actually played Kolin through a few times, with comparable combat efficiency ratings for each side, and the Prussians have a statistically measurable chance of pulling off a win (or at least avoid defeat) if they play their hand right. So it isn't necessary to put your thumb on the scale to give the Prussians a chance.
I have also to differ with your assertion that "it is certain that the prussians shot 3 times as fast as austrian infantry and was far superior." You may be confusing the Austrian Army during the Seven Years War with the poor performance of the Austrians during the previous conflict(War for the Austrian Succession), before their substantial reform. For instance, they had, taking the Prussian, model, adapted iron ramrods (the wooden ones having been upgraded) and a new, more efficient fire drill. I refer you to Duffy's exhaustive volumes on these developments (op cit).
Finally, while we have uncritically bought Frederick's own propaganda about the superiority of his own cavalry, the Austrian arm during this war had also made advancements in its tactics, use, and training. They had been superior to the Prussians during the previous war, but had not lagged in their own upgrade afterwards, even as Prussia improved its own previously abysmal horse. By Kolin, the Hapsburg army was every bit the match for Frederick's and proved to be his most formidable foe throughout the war. I do heartily recommend Duffy's "Instrument of War", "The Force of Arms", and "The Army of Maria Theresa" for background on the evolution of the Austrian army during this period.
Thanks again for your points and for reading my articles.
Thanks too for citing Nosworthy, also one of my many go-to sources for this period (see my bibliography). His "Anatomy of Victory" is very useful and insightful. But it is always prudent in evaluating historical conclusions to compare several references.
Thank you for your outstanding posts and truly incredible maps. I always enjoy them. I just wanted to raise a point concerning infantry squares. I do a good deal of original source reading (journals, memoirs, drill books) on the Seven Years War period and 'square' formations are almost never mentionned. I believe there is a good deal of confusion which transfers over from understandings of Napoleonic combat. One can see just how different things were when one looks at late 18th century Prussian and Russian manuals. Squares were simply not a part of the 18th century linear combat equation. You saw cavalry off with three ranks of muskery, with contiguous or refused lines. Not by forming battalion squares except if you were (exceptionally) isolated on the march. Wargames rules for this period need to adjust for this rather different mode of infantry/cavalry interaction - and bear in mind that there were very few 'breakthrough' cavalry charges in the period (Hohenfriedberg comes to mind), despite occasional successful localised attacks versus infantry.
ReplyDeleteProf KC MacDonald
Well, thank you right back Professor MacDonald, for your compliments about my articles and maps (truth be told, those maps are the real reason I love to do these).
DeleteI agree with you on the overemphasis on squares in infantry tactics, especially in this period. They don't seem to come up all that often in the 18th century, and when they do, they are the exception (I'm thinking of the giant, multi-battalion square formed by Cumberland's right wing at Fontenoy--I'm sure you've read my post on that battle). But in this battle, Kolin, we see the more expedient tactic employed by Prussian infantry when surrounded by cavalry of just facing about the rear rank. While the square did seem to come into its own during the Napoleonic Wars, I noticed that the Austrian and Russian armies still just closed up their columns like hedgehogs when threatened by cavalry (going back to the 16th-17th century tercio. This was far quicker and easier to do, especially with less experienced troops.
And you're right that cavalry hardly ever broke through a solid wall of infantry (regardless of what Hollywood makes us believe). Xenophon himself, in his Anabasis, written two millennia before, pointed out that horses just can't be made to impale themselves on a thicket of pointy sticks. Horses have more sense than people. So that if infantry just held their tight formations, they'd be fine against cavalry.
Did marching colums use roads for movement as shown on the map in the post? It seams that the Prussian army is marching NEXT TO the road, and not ON the road (Prague-Kolin road).
ReplyDeleteWhy is that?
Got your email, on this question, too, Christophe. Which is a good eye for detail on your part and a good question.
ReplyDeleteInfantry, from time immemorial, have marched along the shoulders of the roads to leave the road bed itself open for horse and vehicle traffic. This has been SOP (standard operating procedure) for millennia.
In Frederick's time, infantry marched in columns of platoons along the shoulders (as I've depicted in my battle maps). Marching along the side of the road was not something invented in the twentieth century. Infantry in the middle of the road stood a good chance of getting run over by a galloping battery of guns.
The reasoning for this long-held practice is that foot soldiers could much more easily negotiate the uneven countryside to either side of a road than horse or caissons. And it also kept the roads clear for staff officers to communicate up and down the marching column.
Thanks for the question.
I am surprised by the very detailed Battalion strengths in your analysis. Where did you find such great information?
ReplyDeleteThank you, Mr. Musketier, for your question. As I mentioned in the caveats above the OOB section, these strengths have been derived from overall averages for the battle, then individually randomized around a mean with a standard deviation of 5%, to provide more interest to a war game. As I cautioned, don't use these for academic reference.
DeleteA very interesting approach to bring some variation to unit size in the absence of historical records. Thank you for your response that's very helpful - I was trying to solve the same problem for other SYW battles!
ReplyDeleteIt's a technique I've used in my own wargame simulations, before I started this blog. I also apply the same algorithm to provide variance to combat efficiency and morale ratings. That way, each unit has its own "personality".
DeleteAlso, in my program, the randomized strengths and ratings don't settle until the unit is first activated. That way, I only have an approximate idea of their characteristics beforehand. It's sort of like applying quantum mechanics to wargaming...the Heisenberg Uncertainty Prinicple.
DeleteThanks for the mention Jeff. Once this darn virus is put to rest I will get round to giving you a link on my site.
ReplyDeleteYour site is very well constructed with clear data -great maps!
Best Regards,
Graham J.Morris (Battlefieldanomalies.com)
Will be going back to the Czech Republic next year and require your permission to use your maps of the battlefield of Kolin.
DeleteGraham J. Morris (battlefieldanomalies)
Certainly, Graham. Thanks for asking. I would appreciate credit and a link to my own article on Kolin, too. I'll link to yours as well.
DeleteWas Austrian artillery in the second half of the 18th century the best in the world? Especially after the Liechtenstein reforms.
ReplyDeleteIt was considered the high standard for most of the first half of that century, after Liechtenstein standardized it, and att least until the French Gribeauval system was introduced in 1765.
DeleteLook for this article as it has unit level strengths for both sides: von Hoen, Max. “Die Schlacht bei Kolin am 18. Juni 1757.” Streffleurs Militarische Zietsschrift, I. Band, 11-46. Wien: L.W. Siedle & Sohn, 1911.
ReplyDeleteThanks, Jeff. Is this reference online? I could not, for the life of me (and the dumb-ass search engines I use--God but I hate so-called AI), find it anywhere. Do you have a link?
DeleteI am not sure that my post went through the first time. If it did, please delete this one. Here is the link to the article that I referenced: https://www-google-com.translate.goog/books/edition/_/1a8aAQAAMAAJ?hl=en&gbpv=1&pg=PA11&dq=Hoen%2C+Max.+%E2%80%9CDie+Schlacht+bei+Kolin+am+18.+Juni+1757.&_x_tr_sl=de&_x_tr_tl=en&_x_tr_hl=en&_x_tr_pto=sc&_x_tr_hist=true.
Delete